Configure Node-Wizard
- Next, I can register our remote server to the client. But first, I want to set up console auto-complete for the Node Client to make life a little easier. This is only required if you use the same shell session from the Node Client install.
I'm using the IP address of my server to register, but a server name would work as long as it can be resolved by DNS or /etc/hosts.
dev-user@local-dev:~$ source /usr/share/console-completion/completions/node-clientdev-user@local-dev:~$ node-client -c register-server -S 192.168.6.206 -token wiHobePSERQ7
dev-user@local-dev:~$ node-client -c list-server
192.168.6.206 5e8f5ad35906cb7bbcadb2a93XXXXXX9ae999bc666db73b1d0efdbf7ea6d793e 32 62 - For now, I will request a free 7-day trial license through the Node Client.
dev-user@local-dev:~$ node-client -c request-license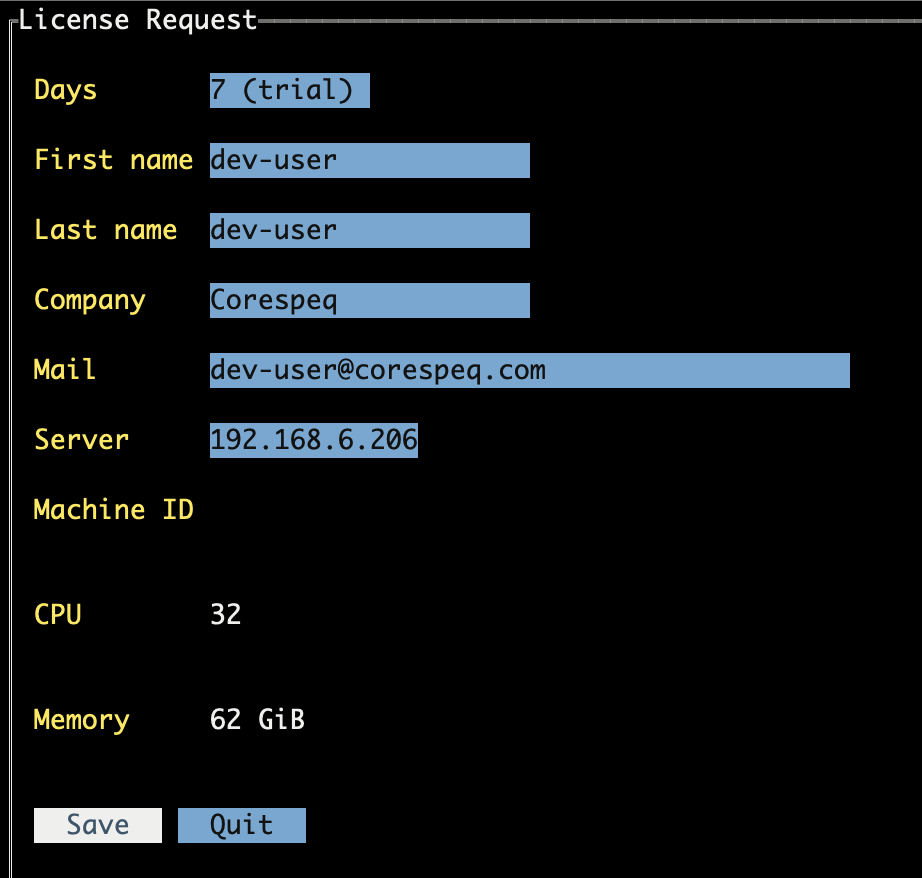
- After registering, I see a message with the license key in my email. A quick download later, and I have it ready for use. If you have issues, double-check the email address used in the registration process or your spam folder.
dev-user@local-dev:~$ cat license-dev-user@corespeq.com-5e8f5ad35906cb7bbcadb2a93XXXXXX9ae999bc666db73b1d0efdbf7ea6d793e.txt
{
 "license_info": {
  "user_info": {
   "first_name": "dev-user",
   "last_name": "dev-user",
   "company": "corespeq",
   "email": "dev-user@corespeq.com",
   "machine_id": "5e8f5ad35906cb7bbcadb2a93XXXXXX9ae999bc666db73b1d0efdbf7ea6d793e",
   "num_cpus": 32,
   "memory_size": 62
  },
  "server_type": "node-wizard",
  "client_type": "node-client",
  "client_version": "0.2.0",
  "start_date": "2024-05-13",
  "end_date": "2024-05-20"
 },
 "signature": "57d28abc54a8e3465410e ... bf5aaba91e1f827762"
} - Next, I set the license for the server and then list all servers registered with the Node Client. I only have one server here, but the Node Client can manage multiple servers.
dev-user@local-dev:~$ node-client -c set-license -f license

dev-user@local-dev:~$ node-client -c list-server
192.168.6.206 5e8f5ad35906cb7bbcadb2a93XXXXXX9ae999bc666db73b1d0efdbf7ea6d793e 32 62 - I can obtain my server's resource information through the Node Client. This will be helpful in the next step when I create a VM and need to decide how many resources to allocate. It is reporting that I have 32 cores, with 12 available. The cool thing is that the Node Wizard sees my pre-existing VMs and can manage those!
dev-user@local-dev:~$ node-client -c system-info -S 192.168.6.206
OS        :     Ubuntu 22.04
CPU cores :     total 32, 20 used by vm, 12 available
Memory    :     total 62.36GiB, 56.00GiB used by vm, 6.36GiB available
Disks     :
		/dev/sda3	total 1742.57GiB, 1605.06GiB available
		/dev/sda1	total 1.05GiB, 1.04GiB available
		/dev/sda2	total 15.58GiB, 14.51GiB available

VMS       :
		Name VM1    CPU 4     Memory 16.00GiB
		Disks:
		vda /storage/VM/images/VM1.img 120.14GiB

		Name VM2    CPU 4     Memory 16.00GiB
		Disks:
		vda /storage/VM/images/VM2.img 120.14GiB

		Name Server1    CPU 4     Memory 16.00GiB
		Disks:
		vda /storage/VM/images/Server1.img 120.14GiB

		Name Server2    CPU 4     Memory 4.00GiB
		Disks:
		vda /storage/cloud-img/VM/images/Server2.qcow2 0.06GiB

		Name Server3    CPU 4     Memory 4.00GiB
		Disks:
		vda /storage/cloud-img/VM/images/Server3.qcow2 0.50GiB